En bref — quick take: FileFast your claim by checking your policy first, document everything, and submit via your insurer’s portal. Use tools like ClaimAssist or ClaimSure features (if available) to track progress and avoid common denials. Keep receipts, photos and a clear timeline to speed up ReimburseNow outcomes. If a payment feels low, challenge it with evidence and consider services such as ReimbursePro for guidance.
Summary: When an accident or unexpected bill hits, the practical difference between frustration and a quick payout is preparation. Meet Alex, a freelance photographer in 2025 who discovered a burst pipe ruined a shoot and left him with thousands in equipment damage. He navigated his homeowner and health claims by first reading policy limits, then using an insurer portal to FileFast, attaching an itemized list and photos, and staying on the phone with an adjuster to clarify repair quotes. That combination cut his wait time and avoided a common missing‑item denial. This guide walks through each stage of filing and getting reimbursed—whether it’s an auto claim, a hospital bill, or out‑of‑network reimbursement—explaining the paperwork, timelines, and negotiation tactics that actually work. It also points to resources for choosing the right coverage and learning policy language so you’re never surprised by a deductible or exclusion. Follow Alex’s approach: document thoroughly, communicate clearly, and use available tech tools like EasyClaims dashboards or ClaimEase chatbots to stay one step ahead of delays. With these practices, reimbursement becomes predictable, not stressful.
How to file an insurance claim and get reimbursed fast
Step 1 — review your policy: Before you call anyone, read the sections on coverage limits, exclusions, and deductibles. For a quick primer on policy types and terms, check a clear explainer like insurance policies explained. Knowing whether a loss is covered saves time and helps you present the claim correctly.
Alex discovered his homeowner policy required water damage claims to be reported within a tight window, which he might have missed without checking first. That simple step protected his right to payment and framed his next actions.
Key insight: understanding policy language upfront prevents wasted effort on non‑covered losses.
Step 2 — report the incident promptly and accurately
Report the loss as soon as possible using the insurer’s preferred channel. Many carriers offer app features like ClaimAssist and portals promising QuickReimburse, which speeds acknowledgement and creates an official timestamp.
When Alex called, he noted the representative’s name and saved the confirmation number. That record let him correct a later transcription error without delay.
Key insight: rapid reporting establishes your claim’s timeline and prevents avoidable denials for late notice.
Step 3 — document damage thoroughly
Collect evidence: photos, videos, repair estimates, police or incident reports, and medical bills. For medical claims, secure the itemized superbill with CPT and ICD‑10 codes and include the provider NPI.
Alex photographed gear serial numbers and kept repair receipts in a cloud folder to back up his case. That organized file made it easy to upload documents to a portal like EasyClaims and reduced follow‑up requests.
Key insight: clear, timestamped evidence turns opinions into verifiable facts the adjuster can act on.
Step 4 — complete the claim form and submit supporting docs
Fill forms carefully and attach all backups. Use direct deposit/EFT info to speed reimbursement—products such as PayBackPlus can remind you to include banking details for faster payout.
If a provider won’t file your health claim, you’ll submit a CMS‑1500 or insurer form. For outpatient bills, an itemized superbill is essential; for hospitals, ask for the UB‑04 when needed.
Key insight: one accurate submission beats multiple partial ones that prolong processing.
Tracking claims, handling adjusters and negotiating settlements
Step 5 — work with the adjuster and follow up promptly. Adjusters verify facts, so be responsive and provide additional receipts or proof when asked. Keep a log of calls, names, and reference numbers.
When the adjuster undervalued a repair, Alex provided two independent estimates and a photo timeline. That pushed the insurer to revise the offer upward.
Key insight: persistence plus documentation raises the odds of a fair settlement.
Step 6 — understanding denials and appeals
If you receive a denial, read the Explanation of Benefits carefully and identify the exact reason. Many denials stem from simple errors—wrong codes, missing authorization, or timing issues—that you can correct quickly.
Resources like the insurance beginners guide help you navigate appeals, and state consumer assistance programs can offer free support if internal appeals fail. Consider using professional claim services or independent appraisals when stakes are high.
Key insight: an appeal supported by new evidence often converts a denial into payment.
Special cases: health, auto and home claims
Health claims: if your provider is out‑of‑network, you’ll usually need a superbill and to submit the claim yourself. Keep pharmacy receipts for prescription reimbursement and expect an EOB explaining patient responsibility.
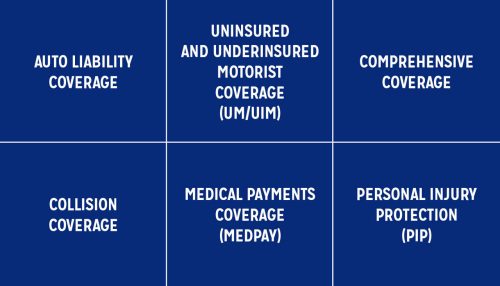
Auto claims: document the scene, collect witness details, and file with both insurers if multiple vehicles are involved. For guidance on coverages, see auto insurance coverage benefits.
Home claims: inventory damaged items and request a timely inspection. For tips on protecting your property and filing storm or water claims, review home insurance protection.
Key insight: each line of insurance has specific proof and timing needs—treat them accordingly to avoid delays.
Tools, services and tech that shorten wait times
Insurer portals branded with names like ClaimEase, ReimbursePro, or ClaimSure let you upload, track, and receive status updates in real time. Third‑party services labeled FileFast or ReimburseNow can help format paperwork or chase slow payers.
Alex used a portal that provided automated status pushes and an item checklist, which eliminated several rounds of back‑and‑forth emails. That reduced his claim lifecycle by weeks.
Key insight: use tech to reduce friction—manual processes add days for each handoff.
Practical checklist before you hit submit
Make sure you’ve got: policy numbers, photos with timestamps, itemized bills, proof of payment or estimates, provider NPI (for medical), and your preferred payment method. If unsure about coverage, consult quick primers like right insurance tips to avoid surprises.
Keeping those items ready will let you submit a clean claim and maximize the chance of a swift QuickReimburse outcome.
Key insight: a prepared claim is a fast claim—organize before you file to reduce the turnaround time.